Node.js w/ Express.js and Pug (Templating Engine)
In this tutorial, we will introduce you to the basics of Express.js, a Node.js framework, by setting up a simple HTTP web server, and use an HTML templating engine called Pug, which earlier was known as Jade.
Create a working directory for your project, say,
/node-project.
Inside /node-project, we will create the
package.json file for our Node.js +
Express.js application typing the below command.
$ npm init
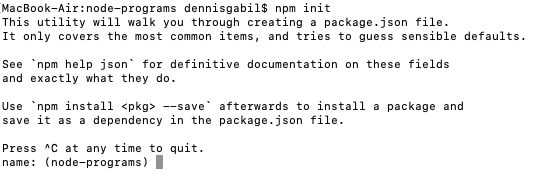
Fill the name,
version,
description and other such fields with
your own values. Now there is one field called
entry point where you can give a name to
your main file (.js file). The default
suggested name is server.js. If you want
some other name, like app.js, you can do
the naming here. It will be created after the
author and
license fields are over.
Express.js
Next, we will install Express.js.
$ npm install express --save
The following code sets up a simple HTTP server with Express.js.
					const express = require('express');
					const app = express();
					const port = 3000;

					app.get('/', (req, res) => {
						res.status(200).send('Hello, World!');
					});

					app.listen(port, () => {
						console.log(`Server started at port ${port}`);
					});
The method get() attached to the express
instance is one of the many route methods in Express.js, along with
post(),
put(),
delete(),
all(), etc. The full list of route
methods can be found
here. The path / passed to
app.get() is the root of our project.
Start the application.
$ npm start
In your terminal console, the below message will get printed
Server started at port 3000
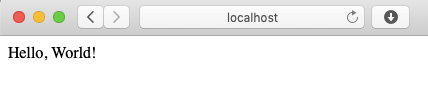
Navigate to
http://localhost:3000
in your browser and you will see the page load as follows:
Load an HTML File
Loading an HTML file is just a small change: use the
sendFile() method instead. Here we load
the below index.html file.
__dirname is the directory name of the
current module.
						<!DOCTYPE html>
						<html>
						<head>
							<title>Node.js + Express.js</title>
						</head>
						<body>
							<h1>Hello, Node.js + Express.js</h1>
						</body>
						</html>
					const express = require('express');
					const app = express();
					const port = 3000;

					app.get('/', (req, res) => {
						res.status(200).sendFile(__dirname + '/index.html');
					});

					app.listen(port, () => {
						console.log(`Server started at port ${port}`);
					});
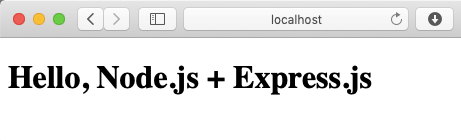
It gets rendered as shown below.
Also, we can keep track of the paths we are accessing by printing
them in console using the
use()
method. The wildcard character * passed
to the get() route method handles the
unspecified or non-existent paths.
					const express = require('express');
					const app = express();
					const port = 3000;

					app.use((req, res, next) => {
						console.log(`URL: ${req.url}`);
						next();
					});

					app.get('/', (req, res) => {
						res.status(200).sendFile(__dirname +  '/index.html');
					});

					app.get('*', (req, res, next) => {
						res.status(200).send('Sorry, requested page not found.');
						next();
					});

					app.listen(port, () => {
						console.log(`Server started at port ${port}`);
					});
The first argument supposed to be passed to the
use() method actually is a path, which
defaults to /. You can check the various
examples on using path
here. So we can also rewrite the above
use() method as below. It will have the
same effect.
					app.use('/', (req, res, next) => {
						console.log(`URL: ${req.url}`);
						next();
					});
Route Parameters
URL segments can be named to pass parameters at the very position in
the URL. The values can then be accessed from the
req.params object. In the following
script, we specify the parameter name in
the path of the route.
					const express = require('express');
					const app = express();
					const port = 3000;

					app.use((req, res, next) => {
						console.log(`URL: ${req.url}`);
						next();
					});

					app.get('/', (req, res) => {
						res.status(200).sendFile(__dirname +  '/index.html');
					});

					app.get('/member/:name', (req, res) => {
						res.end(`Requested member with name: ${req.params.name}`);
					});

					app.get('*', (req, res, next) => {
						res.status(200).send('Sorry, page not found');
						next();
					});

					app.listen(port, () => {
						console.log(`Server started at port ${port}`);
					});
 Rocket Raccoon
by Ryan C.
CC BY-SA 2.0
.
Background: HD188553, NASA/JPL-Caltech
Rocket Raccoon
by Ryan C.
CC BY-SA 2.0
.
Background: HD188553, NASA/JPL-Caltech
We pass the value Rocket in place of the
:name parameter:
http://localhost:3000/member/Rocket

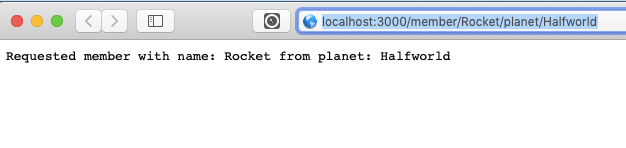
And of course, we can make it work for two parameters as well.
http://localhost:3000/member/Rocket/planet/Halfworld
					const express = require('express');
					const app = express();
					const port = 3000;

					app.use((req, res, next) => {
						console.log(`URL: ${req.url}`);
						next();
					});

					app.get('/', (req, res) => {
						res.status(200).sendFile(__dirname +  '/index.html');
					});

					app.get('/member/:name/planet/:home', (req, res) => {
						res.end(`Requested member with name: ${req.params.name}
								from planet: ${req.params.home}`);
					});

					app.get('*', (req, res, next) => {
						res.status(200).send('Sorry, page not found');
						next();
					});

					app.listen(port, () => {
						console.log(`Server started at port ${port}`);
					});
Express + Pug
In this section we will have a quick look at
Pug, a
high-performance HTML templating engine, and do away with loading of
HTML files. Instead, we will be rendering
.pug template files.
We first install Pug.
npm install pug --save
Next, create a sub-directory inside the root directory for keeping
.pug template files, say,
/views. Now create a simple
.pug file called
index.pug and save it inside the newly
created directory /views. Paste it with
the below code — a simple template to display just one-line
"Welcome to Express.js + Pug".
					doctype=html
					html
						head
							title Express.js + Pug
						body
							h1 Welcome to Express.js + Pug
There are two additional lines of code to be inserted into our
Express.js main file, both involving the
app.set() method with properties
views and
view engine. The
views property points to the directory
(or array of directories) where the templates are kept and the
view engine property assigns the
template engine to use. The
res.render() function inside
app.get() renders the template.
					const express = require('express');
					const app = express();

					const port = 3000;
					const host = 'localhost';

					app.set('views', './views');
					app.set('view engine', 'pug');

					app.get('/', (req, res) => {
						res.render('index');
					});

					app.listen(port, host, () => {
						console.log(`Server started at ${host} port ${port}`);
					});
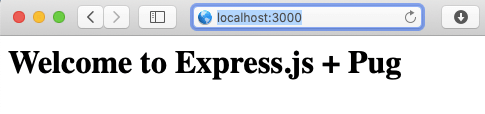
The .pug template gets rendered as
We can also send route parameters, as we did in the previous section. We will send the details of Rocket Raccoon again.
Let us create a new template called
guardian.pug and save it inside the
/views sub-directory.
					doctype html
					html
					  head
					    title Express.js + Pug Demo
					  body
					    h1 Welcome, Guardian!
					    div Member: #{member}
					    p Planet: #{planet}
We append a few lines to our main file
server.js (or,
app.js, whatever name you gave).
const express = require('express');
const app = express();
const port = 3000;
app.set('views', './views');
app.set('view engine', 'pug');
app.get('/', (req, res, next) => {
res.render('index');
});
app.get('/member/:name/planet/:home', (req, res) => {
const memberDetails = {
member: req.params.name,
planet: req.params.home
}
res.render('guardian', memberDetails);
});
app.get('*', (req, res, next) => {
res.status(200).send('Sorry, page not found
');
next();
});
app.listen(port, () => {
console.log(`Server started at port ${port}`);
});
Rocket Raccoon
by Ryan C.
CC BY-SA 2.0
.
Background: HD188553, NASA/JPL-Caltech
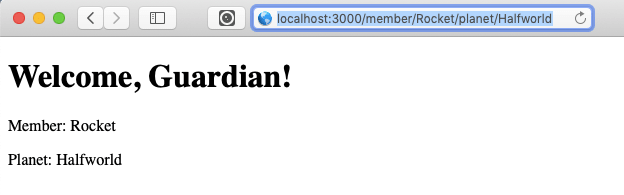
Following the parameterized route
http://localhost:3000/member/Rocket/planet/Halfworld, the guardian.pug template gets
rendered as