React/ReactJS: QlikSense JWT Authentication, The Complete Guide!
This tutorial gives you a complete guide on setting up your ReactJS application to generate a JSON Web Token (JWT) and send it to Qlik Cloud to authenticate a user. A JSON Web Token consists of a header, a payload and a signature.
In this method, a generated JWT, along with its set of claims, is signed in with the created certificate's private key. The signed JWT, along with the web integration id, is sent in the HTTP header to the proxy. The JWT identity provider's configured public certificate is used by the proxy to validate the signature.
Create Private & Public Key via OpenSSL
Download OpenSSL from
https://openssl-library.org/source/index.html
and extract it. After extraction, execute the
Configure file.
Next, open your terminal and create a private key.
openssl genrsa -out privatekey.pem 4096
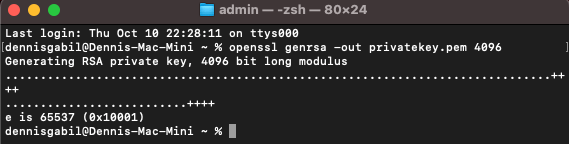 OpenSSL Private Certificate
After the creating the private key, generate the public key certificate via the following command.
openssl req -new -x509 -key privatekey.pem -out publickey.cer -days 1825
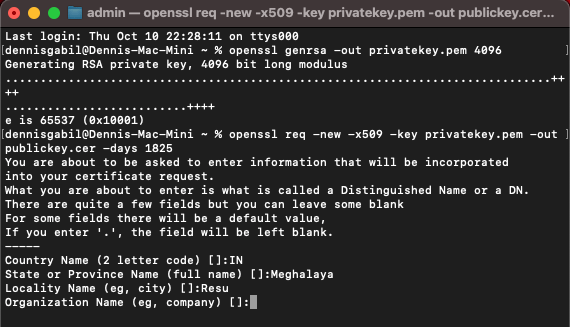 OpenSSL Public Certificate
You will find both the files
privatekey.pem and
publickey.cer created in terminal's
current directory.
 OpenSSL Certificates
Rename
publickey.cer to
publickey.pem, and you can paste its
content next.
Configure JWT Identity Provider
Login to your Qlik Cloud and go to
Administration >
Identity Provider.
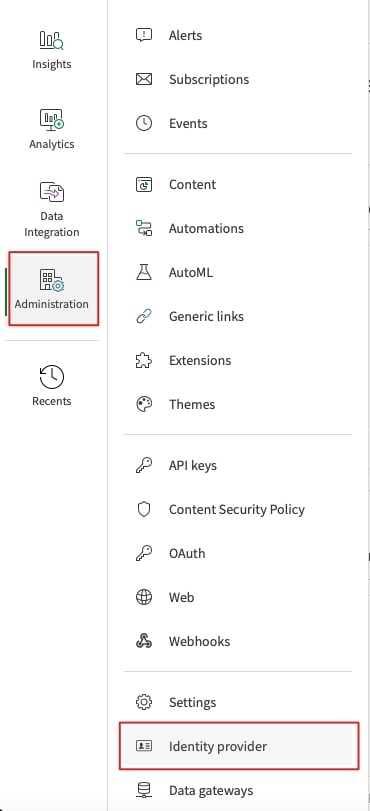 Qlik Cloud Admin JWT Identity Provider
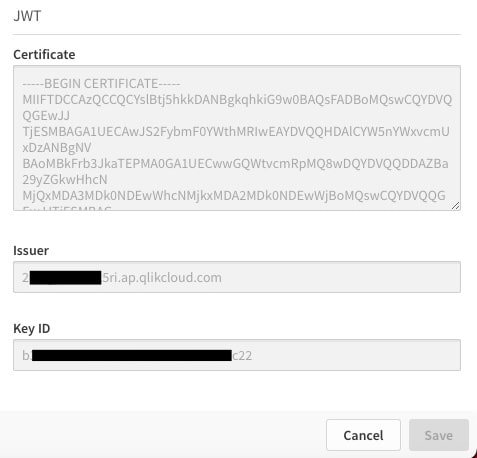
Click on Create New and select
Type as JWT.
In the certificate section, copy & paste the contents of
publickey.pem.
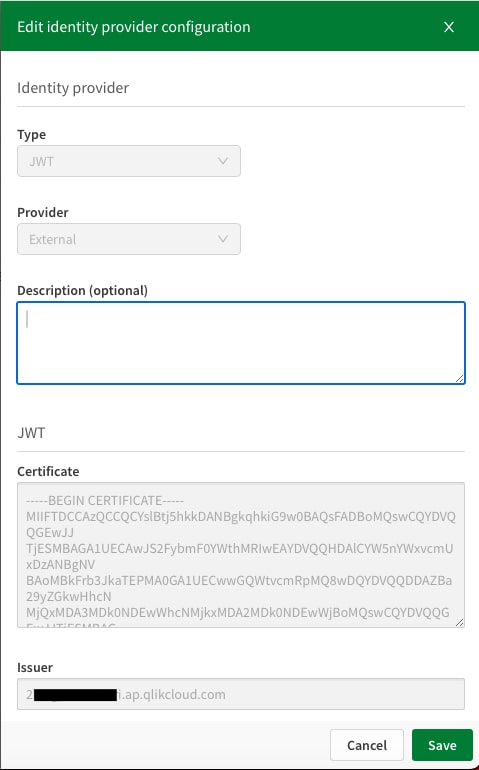 Qlik Cloud JWT IdP
As you click the CREATE button, both the
Issuer and the
Key ID fields will be generated.
Generate Qlik Web Integration ID
Now for JWT integration, one necessary parameter to pass in almost
all API request is the
Qlik Web Integraton ID
(qlik-web-integration-id). If you do not
have one, you need to create it. We write an independent code in
Node.js to generate a Qlik Web Integration ID.
In the below method, you have to pass one user's API key (with Tenant Admin role) for authorization in the headers. To generate or create that API, a tutorial is written here.
					const https = require("https");
					const data = JSON.stringify({
						name: "Qlik JWT Integration",
						validOrigins: [
							"http://your-awesome-website.com",
							"http://localhost:3000" // to test it in your REACT localhost
						],
					});
					const options = {
						hostname: "2*************i.ap.qlikcloud.com",
						port: 443,
						path: "/api/v1/web-integrations",
						method: "POST",
						headers: {
							"Content-type": "application/json",
							Authorization: "Bearer " + "ey*** ... **Cj",
						},
					};
					const req = https.request(options, (res) => {
						let responseData = "";
						res.on("data", (chunk) => {
							responseData += chunk;
						});
						res.on("end", () => {
							console.log("Web Integration ID: ", responseData);
						});
					});
					req.write(data);
					req.end();
On executing the above code, it gives us the
qlik-web-integration-id.
 Qlik Web Integration ID
The Node Code
Now we come to our proper
Node.js code.
We'll configure the server to listen on
PORT:4000. Below is the entry file, the
app.js.
					const express = require("express");
					const app = express();
					const cors = require("cors");
					const routes = require("./routes");

					const PORT = 4000;

					app.use(cors());
					app.use(express.json());
					app.use("/", routes);

					app.listen(PORT), () => {
					  console.log(`Server started on port ${PORT}`);
					});
And then we create two files -
routes.js and
jwt.js. The first file is just for
routing the GET API request to jwt.js.
So, routes.js looks like below.
					const express = require("express");
					const router = express.Router();
					const getJWT = require("./jwt");
					router.route("/jwt").get(getJWT);
					module.exports = router;
Next we create jwt.js.
Generate JWT Token
You first need to import the fs,
uid-safe and
jsonwebtoken modules into your code. In
the payload object, you need to pass the
sub and the
email fields correctly; for the
name field, you can pass what you pass
in the email. The
sub is Qlik's user
id, which you can get upon GET
requesting /api/v1/users. Documentation
is available here:
https://qlik.dev/apis/rest/users/.
For keyid, check your Identity Provider
(IdP) settings.
 Qlik JWT IdP
We have added the below
res.status(200).json({ jwt: myToken });
code to send back JSON response to an incoming GET request. Here is
our jwt.js file.
					const fs = require("fs");
					const uid = require("uid-safe");
					const jwt = require("jsonwebtoken");

					const getJWT = async (req, res) => {
					const payload = {
						jti: uid.sync(32), // 32 bytes random string
						sub: "6********************efb",
						subType: "user",
						name: "you@mail.com",
						email: "you@mail.com",
						email_verified: true,
						groups: [],
					};
					const privateKey = fs.readFileSync("./certs/privatekey.pem", "utf8");

					// keyid and issuer have to match with the IDP config and the
					// audience has to be qlik.api/jwt-login-session
					const signingOptions = {
						issuer: "2*************i.ap.qlikcloud.com",
						keyid: "b**********************-0e2f1731cc22",
						algorithm: "RS256",
						expiresIn: "60s", // expires 60 seconds after the issue date/time.
						notBefore: "0s", // JWT is valid 0 seconds after the issue date/time.
						audience: "qlik.api/login/jwt-session",
					};
					const myToken = jwt.sign(payload, privateKey, signingOptions);
					res.status(200).json({
						jwt: myToken,
					});
					};

					module.exports = getJWT;
JWT Verification
You can verify whether the generated JWT is correct or not. Go to
https://jwt.io and
choose the Algorithm as RS256. In the
bottom right side of the page, under the "VERIFY SIGNATURE" section,
copy and paste the contents of your
privatekey.pem and
publickey.pem certificates respectively.
Now paste your JWT in the "Encoded" left section of the page.
 QlikSense JWT Verification
Validate JWT
In our React code, we first send a GET request to
http://localhost:4000/jwt
to get the JSON Web Token (JWT). Once we get the JWT, POST request
is sent to
https://2*************i.ap.qlikcloud.com/login/jwt-session
to validate it. If the response is "OK", then we go ahead to make
any API calls available under the REST section here:
https://qlik.dev/apis/. In the below example, we make an API call to
/api/v1/items to get all the available
apps to the user.
					useEffect(() => {
						fetch("http://localhost:4000/jwt")
						  .then((res) => res.json())
						  .then((data) => {
							async function jwtLogin() {
							  return await fetch(
								"https://2*************i.ap.qlikcloud.com/login/jwt-session",
								{
								  method: "POST",
								  mode: "cors",
								  credentials: "include",
								  headers: {
									"Content-Type": "application/json",
									"qlik-web-integration-id": "Z******************************0",
									Authorization: "Bearer " + data.jwt,
								  },
								}
							  ).then((response) => {
								if (response.status !== 200) {
								  throw new Error("failed to login via jwt");
								}
							  });
							}

							jwtLogin();

							fetch(
							  "https://2*************i.ap.qlikcloud.com/api/v1/items?limit=100",
							  {
								method: "GET",
								mode: "cors",
								credentials: "include",
								headers: {
								  "Content-Type": "application/json",
								  "qlik-web-integration-id": "Z******************************0",
								},
							  }
							)
							  .then((res) => res.json())
							  .then((data) => {
								console.log(data);
							  });
						  })
						  .catch((err) => {
							console.log(err.message);
						  });
					  }, []);
The response should look something like:
 Qlik API call to get all Apps