React/ReactJS: Set-up Environment
In our
previous tutorial, we
have set an environment variable called
PORT to change the port number as desired
while running the app in localhost. Also, there we have made use of
one .env file where the environment
variable PORT is set.
That was just for the local environment. But there could be several
other variables, each assuming different values in different
environments. In this tutorial, we will learn how to set different
.env files for
customized environment variables
to take different values when deployed in different environments like
development, staging and production.
To start with, we consider the path to the image files in your
project. While working on localhost, you most probably would have
stored and fetched the images from the local
/img directory inside the app. For the
sake of simplicity (of accessing), we take a logo image
logo.png and place it inside the
/img directory of the
/public directory. Note again that this is
the /public directory and not inside your
/src. The JSX might resemble something
like
<img src="./img/logo.png"/>
But for production, this image most probably would be stored in some Content Delivery Network (CDN) and the paths would change. For example, if the image is stored in Amazon Web Services (AWS) S3 bucket, the path could be something like
<img src="https://s3.amazonaws.com/yourapp/img/logo.png"/>
Now, switching back from production to localhost would mean changing
the paths back for each and every image in your app; it would be
monotonous. This is where environment variables and
.env files come in handy. For our image
path example above, we can create one environment variable, say,
REACT_APP_LOGO_PATH which would take
different path values to the logo image depending on the environment.
To achieve this, we maintain two files —
.env.local (for localhost) and
.env.production (for production) —
where its values will be set as required. Note that, custom
environment variables start with
REACT_APP_, and that is why our variable
name above is prepended with REACT_APP_.
The custom environment variables begin with
REACT_APP_.
Now this is how our environment variable
REACT_APP_LOGO_PATH will be stored in
.env files. In
.env.local, its value could be
REACT_APP_LOGO_PATH=./img/
and in .env.production, its value could be
REACT_APP_LOGO_PATH=https://s3.amazonaws.com/yourapp/img/
so that we can load respective .env files
in respective environments. Now there is the
process.env object via which the
environment variables are made available throughout the app. In the
JSX, we could just use the
process.env object to get the
LOGO_PATH variable as
<img src={`${process.env.REACT_APP_LOGO_PATH}logo.png`}/>
NOTE: The environment variables are available throughout the
app via the process.env object.
Here is the component for the above example
					import React, { Component } from 'react';

					const Logo = () => {
					    return(
					      <div>
					        <img alt="" src={`${process.env.REACT_APP_LOGO_PATH}logo.svg`}/>
					      </div>
					    )
					}

					export default Logo;
Now that we have assigned two different values to the same environment
variable in two different .env files, how
exactly do we load a particular .env file
for a particular environment? Or to be precise, how do we load
.env.local in localhost and
.env.production in prodution? This is
achieved via the various npm commands,
which we will learn in the following section.
.env Files and
npm Commands
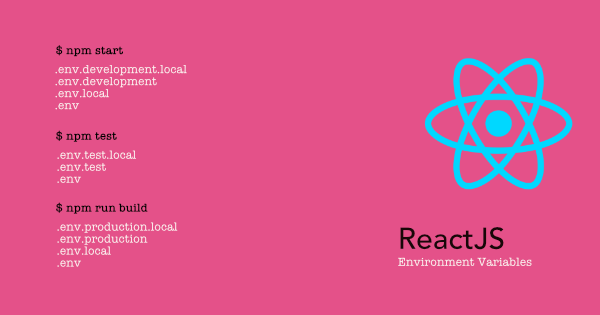
1) npm start
The npm start command is run for
development in local server. Below are the list of
.env files which it picks in terms of
priority from left to right.
.env.development.local,
.env.development,
.env.local,
.env
So, if some values are assigned for the variable
REACT_APP_LOGO_PATH in
env.local and
.env files, it will pick the value
assigned in .env.local.
2) npm test
The npm test command is run for the test
environment. If you have some specs/test files written in
Jest, a node-based
test runner, the command will launch Jest in watch mode. The files
listed below are picked in the priority from left to right.
.env.test.local,
.env.test,
.env
3) npm run build
The npm run build command creates the
/build directory with the optimized
build of your app. The command picks the following files in priority
from left to right.
.env.production.local,
.env.production,
.env.local,
.env