React/ReactJS: Rich Text Editor
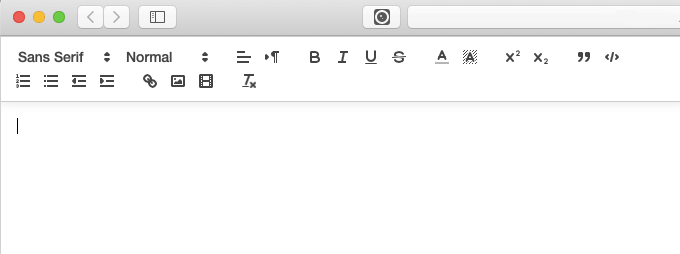
A Rich Text Editor is an interface for editing rich text, which is a formatted text supporting various styles (bold, italics, underline), colours, font families and font sizes. There can also be paragraphs, header elements, line spacing and tab-widths. You can also add hyperlinks, images, videos and audio clips. The toolbar contains an array of icon menus.
Currently, there are many Rich Text Editors available for ReactJS. For
this tutorial, I picked
react-quill, a Quill component
for ReactJS. Quill is a free and open source API driven Rich Text
Editor. You can use it freely for your personal or commercial
projects.
Install the Quill component for ReactJS.
npm i react-quill --save
Setting-up Quill in ReactJS
Import the Quill component for ReactJS, along with the themed
style-sheets associated with it:
quill.snow.css and
quill.bubble.css.
							import ReactQuill from 'react-quill';
							import 'react-quill/dist/quill.snow.css';
							import 'react-quill/dist/quill.bubble.css';
Now we set the toolbar module, one which will allow us to format the entered text. The toolbar module allows us to pick which all formatting options to offer in the menu using an array of formatted names. The list of all formatting options available in Quill can be checked here.
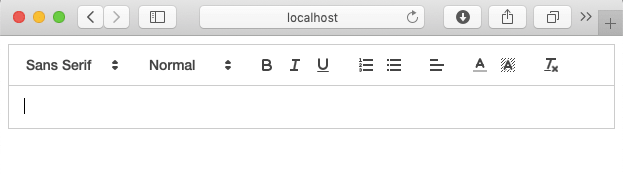
Here we pick the basic formatting options like font family (Sans Serif, Serif, Monospace), font sizes (small, normal, huge, large), styles (bold, italic, underline), lists (ordered, numbered), alignment (left, middle, right) and colours. There will also be one clear format icon.
We set this all up inside the
constructor() function.
					  	constructor(props) {
							super(props);

							this.modules = {
								toolbar: [
							      [{ 'font': [] }],
							      [{ 'size': ['small', false, 'large', 'huge'] }],
							      ['bold', 'italic', 'underline'],
							      [{'list': 'ordered'}, {'list': 'bullet'}],
							      [{ 'align': [] }],
							      [{ 'color': [] }, { 'background': [] }],
							      ['clean']
							    ]
							};

							this.formats = [
							    'font',
							    'size',
							    'bold', 'italic', 'underline',
							    'list', 'bullet',
							    'align',
							    'color', 'background'
						  	];
						}
The <ReactQuill/> Module
Now, before embedding the
<ReactQuill/> component, one very
important thing to consider is how to get the typed texts (along
with the mark-up tags and given inline styles). Most probably they
have to be stored somewhere in a database. The typed and formatted
rich texts can be accessed from the handler attached to the
onChange event, which actually is a
props now. Also we will need to set a state variable to store the
formatted texts temporarily; we will call it
comments.
The handler is named rteChange() for our
example.
<ReactQuill onChange={this.rteChange}/>
The onChange props has four parameters:
content,
delta,
source and
editor. The
contents parameter straight away gives
the HTML, i.e., the formatted text along with all the associated
tags and inline styles. The delta object
expresses the change and the
source object contains the soure of the
change. And finally, the
editor parameter which is a read-only
proxy to useful editor accessors like
getHTML() (returns the full HTML text),
getLength() (returns the number of typed
characters without tags),
getText() (returns the plain text
without mark-up tags), etc. You can check the
full list here.
Below we do console.log() of
getHTML(),
getLength() and
getText().
					  	constructor(props) {
							super(props);
							...
							...
							this.state = {
								comments: ''
							}

							this.rteChange = this.rteChange.bind(this);
						}

						rteChange = (content, delta, source, editor) => {
							console.log(editor.getHTML()); // HTML/rich text
							console.log(editor.getText()); // plain text
							console.log(editor.getLength()); // number of characters
						}
The theme attribute lets you choose an
available theme; here we choose the
"snow" theme (which is also the
default). The "bubble" theme is
tooltip-based and will not be intuitive where to type unless you do
some custom styles for borders and background of the editor. The
modules and
formats props were given the values
which were earlier set inside the constructor. The typed comments
can be accessed from the handler attached to the
onChange props, along with all the
formatted tags and inline CSS styles.
                       	<ReactQuill theme="snow" modules={this.modules}
                       		 formats={this.formats}  onChange={this.rteChange}
                       		 value={this.state.comments || ''}/>
Here is the entire complete component.
						import React, { Component } from 'react';
						import ReactQuill from 'react-quill';
						import 'react-quill/dist/quill.snow.css';
						import 'react-quill/dist/quill.bubble.css';

						class RichTextEditor extends Component {
							constructor(props) {
								super(props);

								this.modules = {
									toolbar: [
								      [{ 'font': [] }],
								      [{ 'size': ['small', false, 'large', 'huge'] }],
								      ['bold', 'italic', 'underline'],
								      [{'list': 'ordered'}, {'list': 'bullet'}],
								      [{ 'align': [] }],
								      [{ 'color': [] }, { 'background': [] }],
								      ['clean']
								    ]
								};

								this.formats = [
								    'font',
								    'size',
								    'bold', 'italic', 'underline',
								    'list', 'bullet',
								    'align',
								    'color', 'background'
							  	];

							  	this.state = {
									comments: ''
								}

								this.rteChange = this.rteChange.bind(this);
							}

							rteChange = (content, delta, source, editor) => {
								console.log(editor.getHTML()); // rich text
								console.log(editor.getText()); // plain text
								console.log(editor.getLength()); // number of characters
							}

							render() {
							    return (
							      <div>
							        <ReactQuill theme="snow"  modules={this.modules}
										formats={this.formats} onChange={this.rteChange}
									value={this.state.comments || ''}/>
							      </div>
							    );
							}

						}

						export default RichTextEditor;
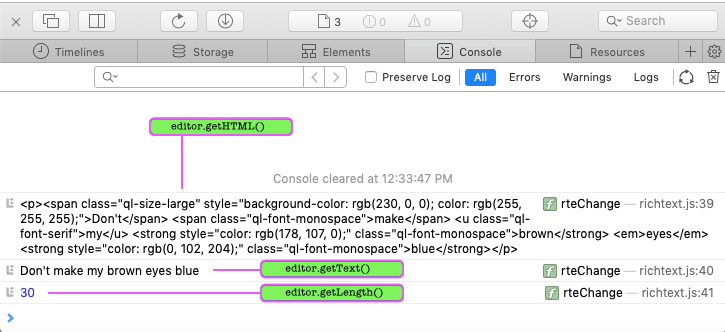
We type a sample line into the text editor and do some formatting around its words.

Below are the respective outputs of
editor.getHTML(),
editor.getText() and
editor.getLength() into the browser
console.
Notes
-
The
bubbletheme is tooltip-based. And if you have a white background on your page you will not be able to make out the editing area; write some custom styles for the border/background.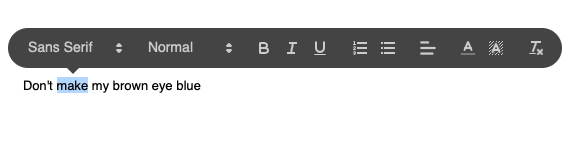
-
React-Quillis MIT licensed.